In this article, we will take the controller x 16 character LCD display 2 lines. You can use LCDs of any size like 1x16, 2x40, 4x20, etc., but keep in mind that it must have HD44780 or a compatible controller which is the most popular of these LCD monitors.
This article refers to the address: http://
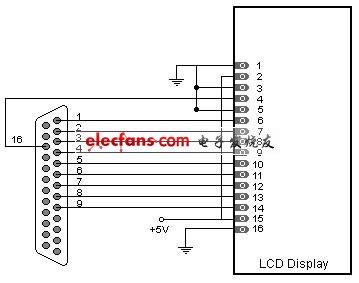
We will use a free printer port (LPT) to communicate between the LCD module and the PC. For this type of interconnection, we only need 10 wires between the LCD and LPT and two additional power lines.
To control the LCD ton here are some free programs, the ability to do this works very well and offers many features. We will find them later.
First, let's see what parts you need:
  
Â
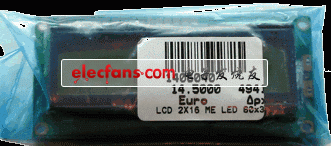
LCD. This is a 2X16 HD44780 compatible chip and backlight. Model SSC2B16DLYY. As you can see in the image, we bought 14.5 euros.
  
Â
Some needle arrays. You need 16 if you have a LCD with backlight.
  
Â
Printer cable. Anywhere, you can find it cheap.
  
Â
An extra cable, a red (5) and black (GND) Molex cable with their power LCD. This is the connection between the existing power cord and the device of a PC.
In addition, you need a soldering tool. Suppose you have this kind of tool
  
Â
Disassemble the LCD
  
Â
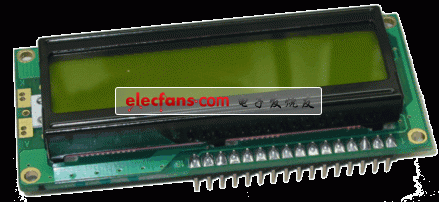
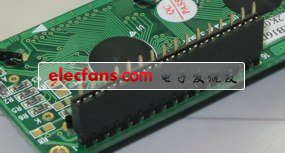
This is the front end of the LCD module. You can clearly see the 1-16 pin, A and K pins (on the left side of the image), if you want a separate power backlight. We won't use them.
  
Â
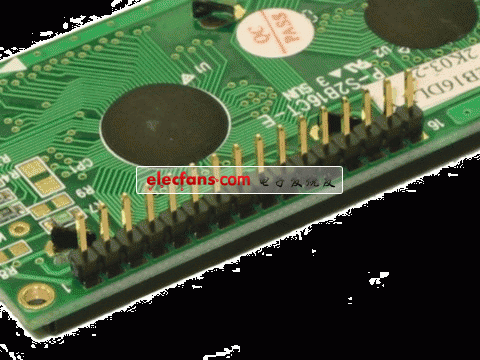
This is the back of the LCD module. Look at the controller chips of these two black circles. You can also see the 1-16 pin A and K pins.
  

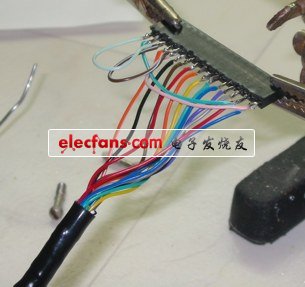
Pin array now
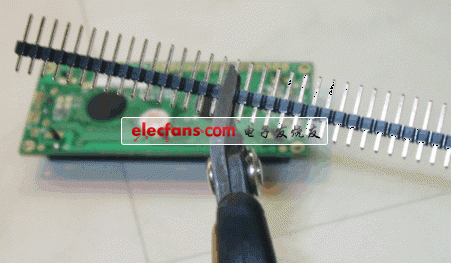
Cut 16 of them if you have a LCD with backlight.
They are suitable for the LCD on the back

The LCD and solder pins are turned on.
Here you can see the needle array welding

Now women's pin arrays are cut and the same number of pins are cut.

 It must fit the image on the left side of the array like yours.
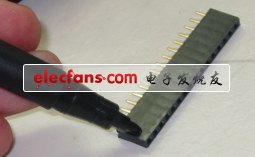

One side of the printer printer cable
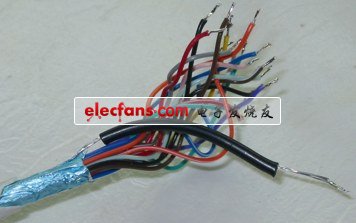
Desoldering wire
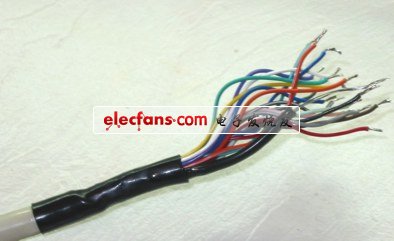
If you like, you can use some heat shrink plasic to get on the line together.
On the left you see the schematic of the female pin array so when it is mounted on the LCD pin correctly matches.
You can use two extra wires without using the other end of the drive's power cord. The cable that will be mounted to the parallel port.

Electronic Air Purifier,Air Cleaner Ionizer,Pm 2.5 Air Cleaner,Air Cleaner Dust
Dongguan V1 Environmental Technology Co., Ltd. , https://www.v1airpurifier.com